Sunday, September 27, 2015

Floating House Final Pictures

Hi.  Today's weather is overcast and cool.  I'm loving every minute of it.

The floating house is finally finished.  The only thing missing is the water around it. I am also thinking of adding greenery to the top channels.   Hubby won't let me put water in the living room.  Can't understand it.

Enjoy.

This is my interpretation of the floating house.  I do have to add a railing on the top.  And I put the steps inside but forgot to take the pictures.  I am quite pleased with the outcome, especially since it is 1:48 scale.

This is one side of the kitchen.  I made the cabinet, sink and stove.  
 This is the bedroom.  Behind the bed is a dresser.  I made everything in here, too.
 In this picture, you can see the fridge/freezer I made.  It's silver.
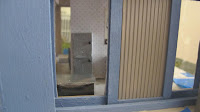
 The picture on the right is the bedroom, looking from the outside.


This is looking into the living room. The furniture is leather.

So although this house has no water potential, I really like it a lot.

Until next time.

Pat

Thursday, September 24, 2015

Third times a charm?

This is the third time I've written this post.  Verizon knocked me off twice.  And even though I saved it during the typing, there's no post. I can't even find the drafts.  Can anyone help?

So I am trying to explain how I got from start of the roof to the finished roof.  A few have asked how I got there.  I will say I followed directions but veered away from them often.


First, I painted the roof because, as I explained, it is a heavy cardboard.  I used Valspar interior paint.  It is a 4 oz container that costs about $4.  I can take any color from the color chips and they will mix it free!  While there is nothing wrong with craft paint, I often don't like their color selection.

                           
Then I did the leading that would look like a metal roof.  I carefully marked where all of the wire would go.

Except I found wire to be very difficult to fight with.  I searched and found some thin black cording in my sewing stash.  Voila!  It worked.


I started at the center and glued the cord down. On the above photo, the cord isn't glued.  I then cut and glued on the lines.  I didn't have to worry when the cord raveled.  The next coat of paint took care of it and there would be a dormer window in the center front.


I finished the front leading.  I laid out strips on the top and sides.  I didn't like the overall look.  And once it's done, that's it.  There's no taking them off.  And for a small building, I think less is more.


Next step was to begin the weathering.  First was to take tissue paper and paint it on.  Looks like a Halloween project.


This is where the directions and I parted ways.  I guess my dry brushing is not very good.  This is the third coat after one of cream and then grey.  All dry brushed.  This is the brown dry brush.  All I thought of was an abandoned building with a rusty tin roof.  Nope.  So I decided that dry brushing brown was not my strong point.


I repainted over the brown.  I gave it several creamy coats of paint. I think it looks weathered but it looks as if the owners of the house take care of their things. LOL  At this point, when it dried, it was ready.


This is the roof finally done.  I placed the dormer windows and the roof chimney pots.  I am pleased with the final results.


I am now in the process of assembling furniture kits for the house. They need to be painted.  I am testing them to see how they fit.  I have a lot to do.

See you next time.

Pat

Sunday, September 20, 2015

Le Petit Maison Work

I would have had this post written sooner but I couldn't find the transfer cord that goes from the camera to the computer.  I looked everywhere for several days.  Finally found it on the floor in back of the couch.  It's better not to ask how it got there.

Also am going to keep my Le Petit Maison work on a separate blog.  I may put up several on the same day for the Projects in Progress and Finished Projects. 

I did several things on the house that I am entering into the contest.    I tried to use thin wire for the edging but the wire refused to work properly.  So I used a little larger gauge and it worked.

The house is a thick board material. The directions said to paint the roof with 2-3 coats of a solid color so I painted the roof three coats of creamy grey.  I have a bad habit of rushing the drying process of both paint and glue.  This time I was smarter and actually put the roof away from my hands. It worked.
The wires for the roof.

The roof after 3 coats of paint.


I bought some laser-cut quarter-scale furniture kits from this wonderful place, Mini Etchers (www.minietchers.com).  I bought a cottage bed, two cottage nightstands, a stove, a refrigerator, two sets of upper cabinets, a sink, a wing chair, a bread box and a plant stand.  I also bought base cabinets for the kitchen.  They came today!

So I was busy today putting these kits together.  I will paint them in the next few weeks.  I do have some of my progress to show you.


This is what they look like when finished.  I think they are so cute.
See these tiny pieces?


I have decided finally that the house will be a French cottage.  I wasn't sure but I am now.  I love the look of them.

Until tomorrow...

Pat


Friday, September 11, 2015

I am back.  I have, in the past few years, been getting stronger after my stroke.  So now I think I am well enough to share some more of my work.

I will post pix of what I have finished.  I will also post the projects in progress.

Also, I have joined up to participate in the contest from Undersized Urbanite (I call it U.U.).  I have a 1/4 scale dollhouse from Petite Properties.  I have until February 2016 to finish it.  Then it's time for the judging. So I will let everyone know how to vote!

I think that I will divide my future posts into three sections:  My work on the house for U.U. will be first, next I will post my projects in progress and then post my finished projects.

I hope some of you will come back to this blog.  I'll try to post several times each week.

U.U. House


This is the front of the house.  It is quarter-scale.  I painted it a silver grey with lighter grey and white trim.

Projects in Progress

 I saw this floating house while searching for something different.  I fell in love with it. It is built by SteelTec and I found there are many floating houses out there.

So I decided to design in in quarter-scale.

The photo on the right is my start.  I wanted the windows to slide like the original house.  That was so difficult.  I had to make channels, which were a challenge  I used this special plasticene sheet that I purchased at a model store.  I will use it for the bent side piece.
I put on the second story and because I want it to be shown, I left the top windows open with only a piece of plastic (for window panes) so the inside can be seen.  The grey posts you see on the corners of my house are from a thin cardboard roll my hubby found at work. I needed something for the top piece so I used the round plastic piece from the milk carton pull-up piece.  All painted grey.


I am getting ready to put the stairs on it.  I will post a picture of the original house with the stairs.

Finished Project

 This is from a kit.  A quarter scale building that I made into a coffee shop.  I made the pictures in the front part of the table and stools.  In the second picture, I put the QS chairs that I received from a friend.


This is the one side of the cafe.  The next pic is the other side.  It has a flowering vine creeping up the side, a flower bed at the end of the patio and a couch that was part of the set from a friend.  You can't hardly see it, but there is a skylight in the left photo.


So this is how I have been.  I will be working on the roof of the U.U. house this weekend.  I have to buy some more brown paint.

Until next time...

Pat